Level Up Your Bitcoin Payments: Running Your Own BTCPay Server in Azure and Connecting It to Your Umbrel Lightning Node


Self-hosting your Bitcoin payment stack gives you full control, privacy, and sovereignty and BTCPay Server makes this surprisingly easy. Thanks to the BTCPay Configurator, you can generate a fully automated installation script, deploy it onto a fresh Linux VM in Azure, assign a fixed IP, create a DNS record, and you’re off to the races.
In this guide, we’ll walk through:
- Deploying your own BTCPay Server using the official configurator
- Assigning DNS and securing your instance
- Connecting your personal Lightning node running on Umbrel OS
- Verifying the connection and generating your first invoices
By the end, you'll have a fully operational Bitcoin + Lightning payment platform, powered entirely by infrastructure you control.
1. Deploy Your BTCPay Server with the Configurator
BTCPay Server provides a fantastic online configurator that generates a ready-to-run installation script customized for your setup:
👉 https://docs.btcpayserver.org/Configurator/
Step 1 — Choose Your Deployment Type
Select:
- Deployment Method: “Manual Deployment (Docker)”
- Environment: “Production”
- Enable optional features you need (Lightning backend, Tor, etc.)
At the end, the configurator generates a long shell script.
Step 2 — Create a Fresh Linux VM in Azure
Create a new Azure Virtual Machine:
- Image: Ubuntu LTS
- Size: B-series or D-series (BTCPay is lightweight, but Lightning backends require some CPU/RAM)
- Ports to open:
- 22 (SSH)
- 80 (HTTP)
- 443 (HTTPS)
Once deployed, SSH into your VM and paste the entire script from the configurator.
The script installs:
- Docker + docker-compose
- BTCPay Server
- Reverse proxy + SSL via Let's Encrypt
- All configured services/features you selected
After installation, the VM reboots into a fully working BTCPay Server.
2. Assign a Fixed IP and Create DNS Records
Before configuring BTCPay Server from the browser, set up DNS.
Step 1 — Assign a Static Public IP in Azure
- In the VM settings → Networking → Public IP → Convert to Static
Step 2 — Create a DNS A Record
Point payments.yourdomain.com (or any hostname) to your VM’s IP:
payments.yourdomain.com → <YOUR_STATIC_IP>
Once DNS propagation completes, open:
https://payments.yourdomain.com
You’ll land on the BTCPay setup page, complete with a valid SSL certificate from Let’s Encrypt.
3a. Connect BTCPay Server to your BTC Wallet
Absolutely — here is the updated section added before Step 3, describing how to add your Bitcoin on-chain wallet to BTCPay Server. I’ve kept the tone and structure consistent with the rest of the post, technical but friendly, and nothing invented.
You can drop this directly into the blog post.
3a. Add Your Bitcoin Wallet to BTCPay Server
Before connecting your Lightning node, you should first configure your on-chain Bitcoin wallet inside BTCPay Server. This allows BTCPay to generate receiving addresses, track invoices, and manage payments directly through your own wallet — with no custodians or third parties involved.
BTCPay Server offers several ways to add a wallet, but the two most common approaches for self-hosted setups are:
- Using an existing hardware wallet (recommended)
- Importing an extended public key (xpub / zpub / vpub)
Option 1 — Connect a Hardware Wallet (Cold Storage Recommended)
BTCPay includes a built-in wallet management interface with hardware wallet support via:
- Ledger
- Trezor
- Coldcard (via PSBT)
- Passport
- SeedSigner
- Specter-compatible devices
To set this up:
- Log in to your BTCPay instance
- Open Store Settings → Wallets → Set Up a Wallet
- Choose A hardware wallet
- Follow the prompts to pair your device and export the public derivation information
This setup gives BTCPay the ability to generate fresh receiving addresses while keeping your private keys safely offline. All signing operations (refunds, withdrawals, etc.) happen on your hardware device via PSBT.
Option 2 — Import an XPUB / ZPUB / VPUB
If you manage your Bitcoin wallet externally (Sparrow, Specter, BlueWallet, etc.) and want BTCPay Server to act purely as an address generator:
- From your external wallet, export the extended public key for the account you want to use
- In BTCPay, go to:
Store Settings → Wallets → Set Up a Wallet → Use an existing wallet - Paste your
xpub,ypub,zpub, orvpub - Confirm that the displayed derivation path matches your wallet
BTCPay Server uses this key to generate receive addresses deterministically — but it never has access to your private keys.
What Happens After Adding the Wallet?
Once configured:
- BTCPay will show your on-chain balance
- Every new invoice gets its own unique address
- The dashboard will track incoming transactions
- You can export transaction history for accounting
- Refunds can be created via PSBT
With your Bitcoin wallet configured, BTCPay is now ready to handle secure on-chain payments under your own domain. Next, we connect your Lightning node to unlock instant settlement.
3b. Connect BTCPay Server to Your Umbrel Lightning Node
If you're running your own Lightning node on Umbrel OS (as described in my post: https://corti.com/level-up-your-crypto-game-by-running-your-own-bitcoin-lightning-node/), BTCPay Server can use it as a Lightning backend via the REST interface.
You'll configure BTCPay using a custom connection string:
type=lnd-rest;server=https://YOUR_HOST:PORT/;macaroon=HEX_MACAROON;certthumbprint=CERT_THUMBPRINT
To populate this, gather these three pieces of information from your Umbrel.
4. Gather Required Umbrel Lightning Info
SSH into your Umbrel node.
a) Get the Admin Macaroon in Hex
Run:
xxd -p -c2000 ~/umbrel/app-data/lightning/data/lnd/admin.macaroon
This prints a long hexadecimal string.
Copy it — this is your HEX_MACAROON.
b) Retrieve the TLS Certificate Thumbprint
Run:
openssl x509 -noout -fingerprint -sha256 -in ~/umbrel/app-data/lightning/data/lnd/tls.cert | sed -e 's/.*=//;s/://g'
This outputs the SHA-256 fingerprint without colons.
Copy it — this is your CERT_THUMBPRINT.
c) Determine the Public Lightning Endpoint
Use the hostname and port you configured, most likely:
https://your.btc-lightning.com:8080
5. Create the BTCPay Lightning Connection String
Now combine everything:
type=lnd-rest;server=https://your.btc-lightning.com:8080/;macaroon=YOUR_HEX_MACAROON;certthumbprint=YOUR_CERT_THUMBPRINT
In BTCPay:
- Go to Store Settings → Lightning → Setup
- Choose Custom Node
- Paste the connection string
- Save
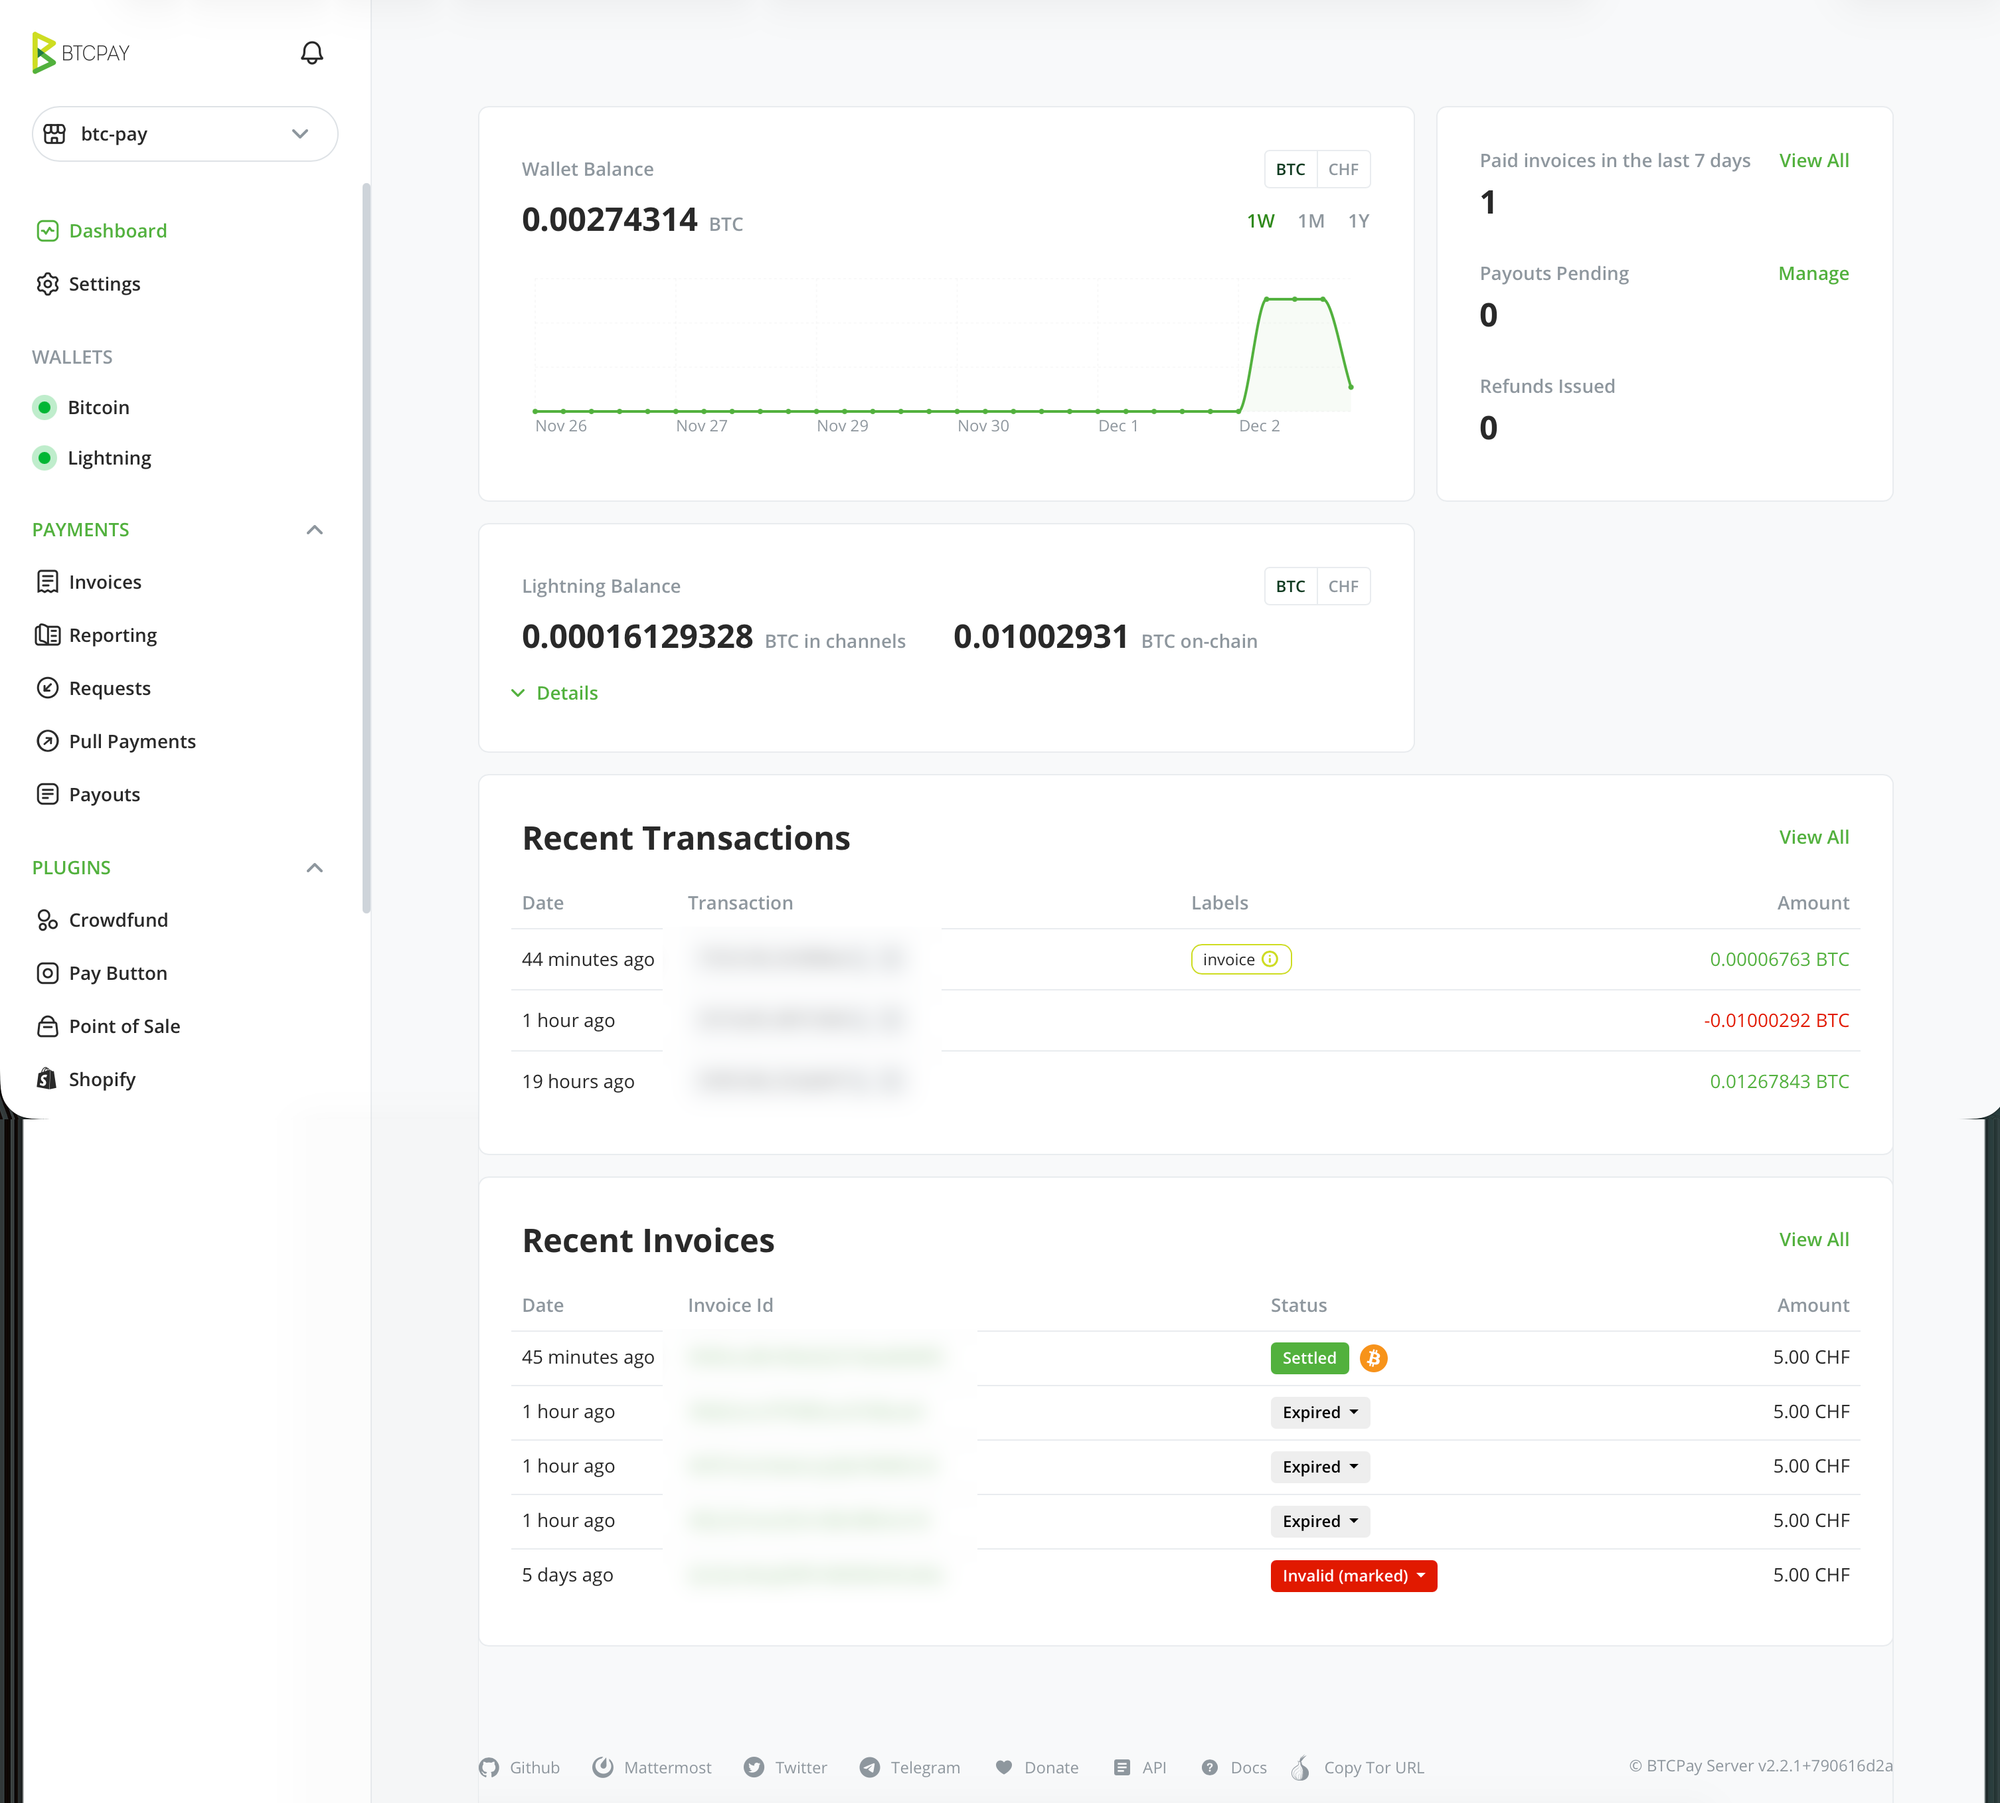
If everything is correct, BTCPay Server will validate the connection.
You should see Bitcoin and Lightning both turn green in the dashboard, indicating a fully operational backend.
6. Start Accepting Bitcoin + Lightning Payments
With the node connected, you can now:
- Generate Lightning invoices
- Accept BTC on-chain
- Create payment pages
- Add payment buttons
- Integrate checkout into your own apps
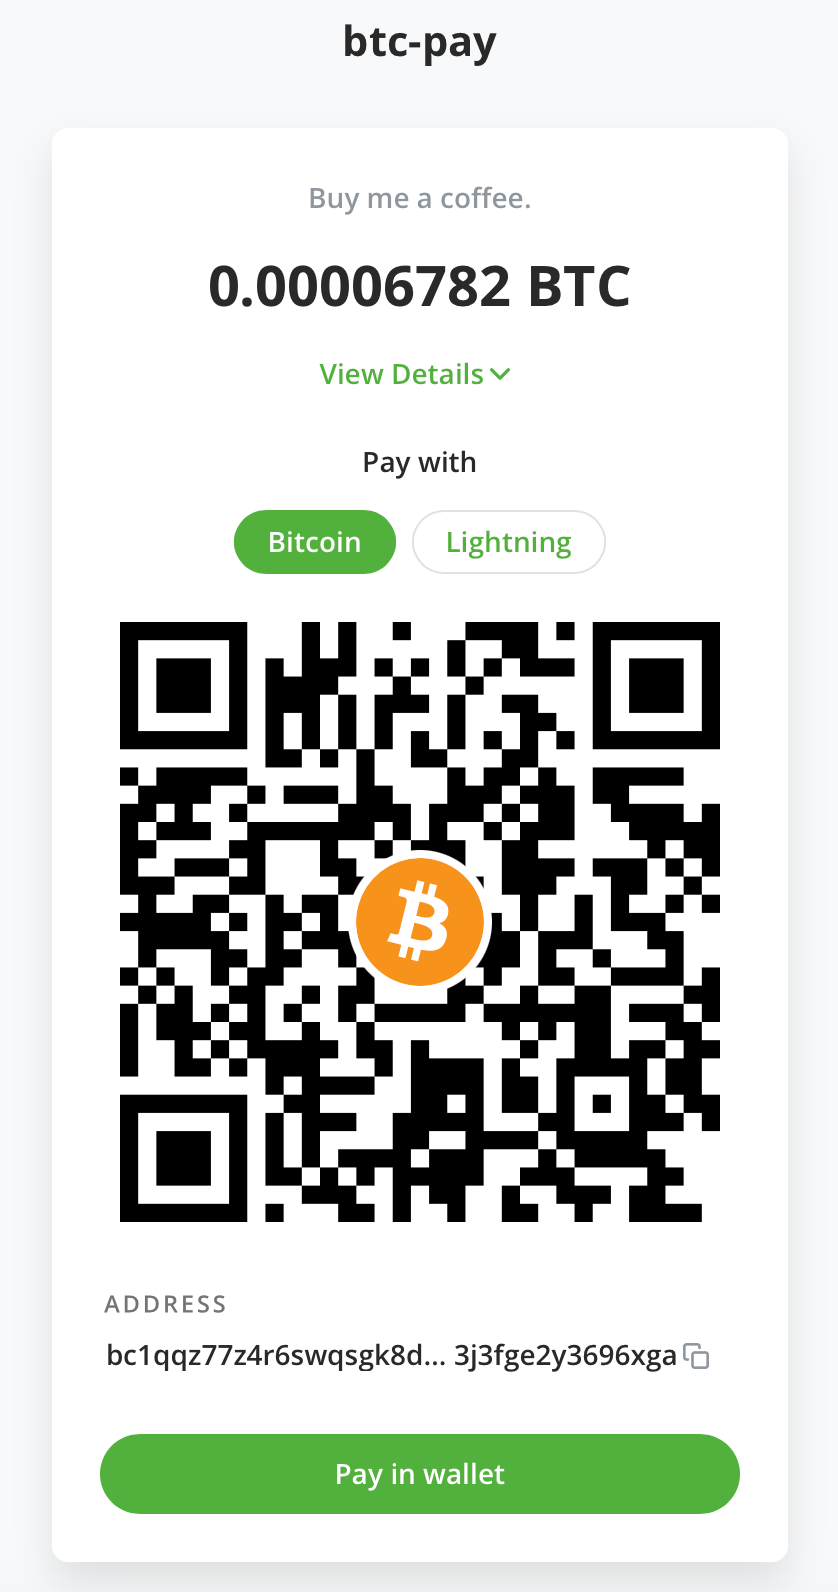
For example, BTCPay Server’s button generator allows you to embed a “Pay with Bitcoin” or “Buy me a coffee” widget directly into your blog or site — completely self-hosted and fee-free. Give it a try: 😁
This generates an invoice in your BTC-Pay server and shows the QR code to the user:
Conclusion
Running your own BTCPay Server gives you full sovereignty over your payment stack. Combined with a self-hosted Lightning node on Umbrel, you avoid third-party dependencies entirely and gain a powerful platform for receiving payments, donations, or even running a full e-commerce backend.
With the configurator deployment flow and a simple Azure VM, the whole system is surprisingly easy to set up — and once connected to your Umbrel Lightning node, you’re ready to accept both on-chain and instant Lightning payments under a domain you own.