
Tiny11: Giving an Old, Unsupported PC a Secure Second Life with a Minimal Windows 11 Installation

When Windows 10 reached end of support, many perfectly usable PCs were pushed into an uncomfortable corner. The hardware still worked. The CPU was still fast enough for web browsing, email, light office work, home automation dashboards, media playback, or workshop use. But the machine could not officially upgrade to Windows 11 because it lacked one or more of Microsoft’s hardware requirements: TPM 2.0, Secure Boot-capable UEFI firmware, a supported CPU generation, or other platform capabilities.
That is where Tiny11 becomes interesting.
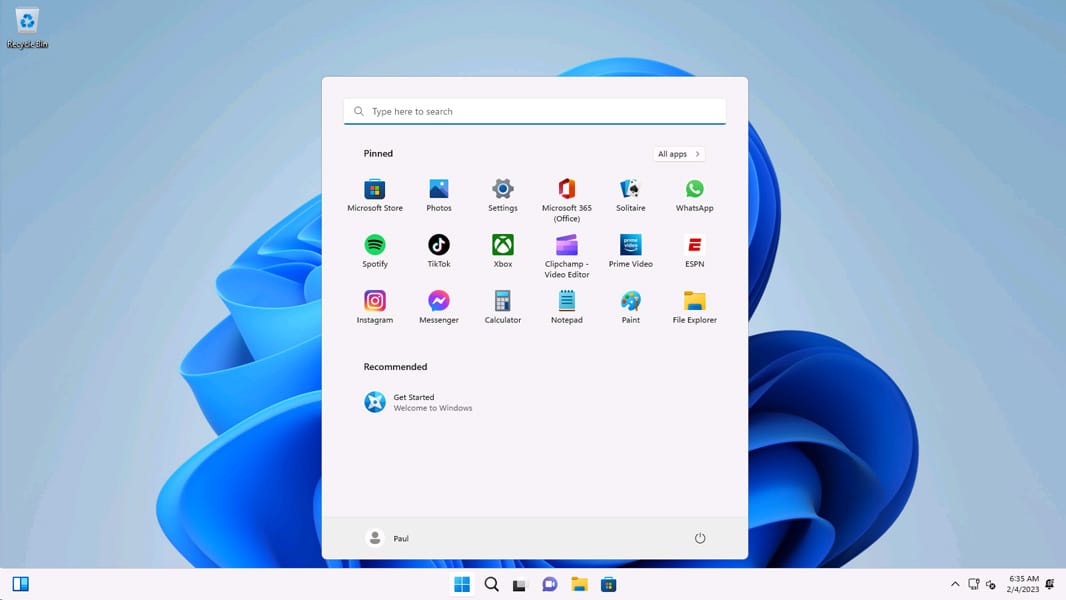
Tiny11 is not a different operating system. It is not Linux with a Windows skin. It is not a free copy of Windows. It is a streamlined Windows 11 image, produced by removing many of the built-in applications and components that make a standard Windows installation heavier than some older machines can comfortably handle.
Used carefully, Tiny11 can extend the practical life of an older PC. It can turn a machine that feels sluggish or unsupported into a usable lightweight Windows workstation. Used carelessly, however, it can also create security, servicing, and support problems. The important distinction is this: Tiny11 is useful when treated as a deliberate, minimal Windows deployment strategy, not as a magic way to bypass licensing, security, or lifecycle realities.
The Problem: Windows 10 End of Support Meets Windows 11 Hardware Requirements
Windows 10 support ended on October 14, 2025. After that point, normal consumer Windows 10 systems no longer receive the same flow of free security updates, feature updates, or technical support. The operating system may continue to boot and run applications, but the risk profile changes because newly discovered vulnerabilities are no longer addressed in the same way.
The obvious recommendation is to move to Windows 11. For newer PCs, that is straightforward. For older PCs, it often is not.
Windows 11 has a more restrictive hardware baseline than Windows 10. Officially supported installations require hardware features such as TPM 2.0, Secure Boot-capable UEFI firmware, sufficient memory and storage, and a supported processor class. These requirements are rooted in Microsoft’s security and reliability model for Windows 11, but they also mean that a large number of older PCs cannot upgrade through the normal supported path.
That creates a frustrating sustainability problem: a PC can be technically functional but administratively obsolete.
For many home users, hobbyists, labs, workshops, makerspaces, and secondary-use scenarios, replacing that machine may feel wasteful. Tiny11 is one response to that problem.
What Tiny11 Actually Is
Tiny11 is best understood as a trimmed Windows 11 image.
The most relevant project today is tiny11builder, an open-source set of PowerShell scripts from NTDEV that automates the creation of a smaller Windows 11 installation image. Instead of trusting a random prebuilt ISO from the internet, the preferred workflow is to start with an official Microsoft Windows 11 ISO and then use Tiny11builder to generate your own reduced image.
That distinction matters.
Downloading unofficial operating system ISOs from random mirrors is risky. The operating system is the trust anchor for the entire machine. If the ISO is tampered with, every password, browser session, SSH key, document, and local credential on that machine may be exposed. Building the image yourself from an official Microsoft ISO is the safer and more transparent approach.
Tiny11builder removes a range of bundled Windows applications and optional components. According to the project documentation, the regular tiny11maker.ps1 script removes items such as Clipchamp, News, Weather, Xbox, Get Help, Get Started, Office Hub, Solitaire, People, Power Automate, To Do, Alarms, Mail and Calendar, Feedback Hub, Maps, Sound Recorder, Your Phone, Media Player, Quick Assist, Internet Explorer remnants, Tablet PC Math, Edge, and OneDrive.
The result is a leaner Windows 11 image with less default application clutter and a smaller footprint.
Tiny11builder vs. Tiny11 Core Builder
Tiny11builder currently provides two important script variants:
tiny11maker.ps1
tiny11coremaker.ps1
For a real PC that you want to use regularly, tiny11maker.ps1 is the sensible default.
The regular Tiny11 maker removes a lot of bundled components but keeps the system serviceable. That means you can still add languages, updates, and features after installation. This matters for real-world use because Windows installations need to be patched, maintained, and adapted over time.
The more aggressive tiny11coremaker.ps1 script creates a much smaller image, but it removes more of the servicing infrastructure. The project documentation explicitly positions Tiny11 Core as a quick development or testbed environment rather than a normal Windows 11 replacement. It is useful for experiments, virtual machines, and highly constrained test scenarios, but it is not the right choice for a daily-use old PC.
For extending the life of an older physical machine, use the regular Tiny11 builder, not Tiny11 Core.
Why Tiny11 Can Help Older PCs
A standard Windows 11 installation includes many apps and background components that are reasonable on a modern PC but expensive on older hardware. Disk I/O, memory pressure, update activity, startup tasks, preinstalled applications, search indexing, cloud integration, and background services all add up.
On an older machine with 4 GB or 8 GB of RAM, a slow SATA SSD, or an aging CPU, reducing that baseline overhead can make the difference between “technically boots” and “pleasant enough to use.”
Tiny11 helps in several ways:
- It reduces the number of bundled apps installed by default.
- It lowers the amount of background clutter.
- It produces a smaller Windows image.
- It can make initial installation and post-install cleanup simpler.
- It avoids some of the consumer-facing Windows 11 defaults that many technical users remove manually anyway.
This does not turn an old PC into a new one. A weak CPU is still a weak CPU. A spinning hard drive is still a bottleneck. A system with 2 GB of RAM will still be painful. But for many Windows 10-era PCs, especially those with an SSD and at least 4 GB of RAM, Tiny11 can make Windows 11 feel more realistic.
The Important Caveats
Tiny11 is useful, but it comes with tradeoffs.
First, Tiny11 is unofficial. It is not a Microsoft product, and Microsoft does not endorse it as a supported Windows 11 deployment model. If something breaks, you should not expect normal vendor support.
Second, Tiny11 does not remove the need for a valid Windows license. It may be free to build and install, but Windows licensing still applies. Tiny11 is not a way to get Windows for free.
Third, removing components can have side effects. Some applications expect built-in Windows components to exist. Some enterprise management tools, recovery workflows, Microsoft Store functionality, browser assumptions, or optional Windows features may behave differently.
Fourth, security must be considered carefully. A trimmed Windows image can have less attack surface in some areas, but an unsupported or poorly maintained system can still be risky. The goal should not be “install Tiny11 and forget about updates.” The goal should be “build a minimal Windows installation that is still serviceable and maintained.”
Fifth, old hardware may still lack important security capabilities. If the PC does not have TPM 2.0 or Secure Boot, you may be able to run Windows 11 in practice, but you are not getting the full security posture Microsoft designed for supported Windows 11 devices.
Tiny11 is therefore best suited for secondary systems, lab machines, hobby PCs, lightweight workstations, dedicated-purpose devices, or machines where the alternative is e-waste. I would be much more cautious about using it for a primary work machine, banking machine, corporate endpoint, or device storing sensitive data.
Recommended Use Cases
Tiny11 makes the most sense for:
- A spare Windows PC used for browsing, writing, printing, scanning, or media playback.
- A workshop or garage PC.
- A home lab machine.
- A kiosk-style device.
- A lightweight development test box.
- A family member’s older PC used for simple tasks.
- A machine that would otherwise be discarded.
- A local dashboard for Home Assistant, monitoring, 3D printing, or IoT tooling.
It is less appropriate for:
- A corporate-managed endpoint.
- A security-sensitive workstation.
- A machine used for privileged administration.
- A PC that must meet compliance requirements.
- A device used by someone who cannot troubleshoot Windows issues.
- Any system where official Microsoft support is mandatory.
The Best Tiny11 Approach: Build It Yourself
There are two broad ways people get Tiny11:
- Download a prebuilt Tiny11 ISO.
- Build a Tiny11 ISO yourself from an official Windows 11 ISO.
The second option is strongly preferable.
Building it yourself gives you a clearer trust chain:
Official Microsoft Windows 11 ISO
        ↓
Open-source Tiny11builder script
        ↓
Locally generated tiny11.iso
        ↓
Bootable USB installer
        ↓
Old PC installation
That is far better than relying on an opaque ISO from an archive or third-party mirror.
Step-by-Step Guide: Installing Tiny11 on an Old PC
The following walkthrough assumes you are building a Tiny11 ISO yourself on a Windows machine and then installing it on the old PC.
Step 1: Check Whether Tiny11 Is the Right Choice
Before you begin, decide whether the PC is a good candidate.
A realistic minimum for a useful Tiny11 machine is:
CPU:        64-bit dual-core processor
RAM:        4 GB minimum, 8 GB preferred
Storage:    64 GB minimum, SSD strongly preferred
Firmware:   UEFI preferred
Network:    Ethernet or supported Wi-Fi adapter
If the machine still uses a mechanical hard drive, upgrading to a cheap SATA SSD will often make a bigger difference than any operating system tweak.
Also consider alternatives. If the user does not specifically need Windows applications, a lightweight Linux distribution or ChromeOS Flex may be simpler and safer. Tiny11 is most compelling when you want to keep a Windows environment on hardware that cannot run full Windows 11 comfortably or officially.
Step 2: Back Up the Old PC
Assume the installation will erase the old PC.
Back up:
- Documents
- Pictures
- Downloads
- Browser bookmarks
- License keys
- Application installers
- Game saves
- SSH keys
- VPN profiles
- Email archives
- Anything stored on the desktop
If possible, create a full disk image before wiping the machine. At minimum, copy user data to an external drive or network share.
Step 3: Download an Official Windows 11 ISO
On a separate working Windows PC, download the official Windows 11 ISO from Microsoft.
Do not start from an unknown ISO. The whole point of the Tiny11builder approach is that you can start from Microsoft’s official installation media and generate your own minimal image.
Save the ISO somewhere easy to find, for example:
C:\ISO\Win11.iso
Step 4: Download Tiny11builder from GitHub
Download the Tiny11builder repository from GitHub:
https://github.com/ntdevlabs/tiny11builder
You can either clone it with Git:
git clone https://github.com/ntdevlabs/tiny11builder.git
Or download it as a ZIP file from GitHub and extract it.
For example:
C:\Tools\tiny11builder
Step 5: Mount the Windows 11 ISO
In Windows Explorer, right-click the Windows 11 ISO and select:
Mount
Windows will mount the ISO as a virtual DVD drive, for example:
D:
Note the drive letter. You will need it when running the Tiny11builder script.
Step 6: Prepare a Scratch Drive or Folder
Tiny11builder needs working space to mount and modify the Windows image. Use a drive with enough free space and good performance.
For example, if your main drive has plenty of space, you might use:
C:
If you have a faster secondary SSD, use that.
Avoid running the process from a nearly full disk or slow external USB stick. Image servicing performs significant disk reads and writes.
Step 7: Open PowerShell 5.1 as Administrator
Open the Start menu, search for:
Windows PowerShell
Right-click and select:
Run as administrator
The project documentation specifically refers to PowerShell 5.1. Avoid using PowerShell Core unless you have verified compatibility.
Step 8: Temporarily Allow Script Execution
In the elevated PowerShell window, run:
Set-ExecutionPolicy Bypass -Scope Process
Using -Scope Process means the policy change only applies to the current PowerShell session. It does not permanently weaken the script execution policy on the machine.
Step 9: Run the Tiny11 Maker Script
Change into the Tiny11builder directory:
cd C:\Tools\tiny11builder
Run the regular Tiny11 maker script, not the core version:
.\tiny11maker.ps1 -ISO D -SCRATCH C
Replace D with the drive letter of your mounted Windows 11 ISO.
Replace C with the drive you want to use for scratch space.
The script may ask you to select the Windows edition or SKU to base the image on. Choose the edition that matches your license, for example:
Windows 11 Pro
Windows 11 Home
If asked whether to enable .NET Framework 3.5 support, decide based on your expected application needs. Older Windows desktop applications may require it.
Step 10: Wait for the ISO Build to Complete
The script will service the image, remove selected components, apply compression, and create a new ISO.
When it completes successfully, you should find a file named:
tiny11.iso
in the Tiny11builder folder.
This is your locally built minimal Windows 11 installer.
Step 11: Create a Bootable USB Installer with Rufus
Download and run Rufus on the working PC.
Insert a USB stick. Use at least 8 GB, preferably 16 GB or larger.
In Rufus:
Device:          Select your USB stick
Boot selection:  Select tiny11.iso
Partition scheme: GPT for UEFI systems, MBR for older BIOS systems
File system:     Usually NTFS
For most Windows 11-era systems, GPT and UEFI are appropriate. For very old PCs, you may need MBR/BIOS mode.
Be careful: Rufus will erase the USB stick.
Start the write process and wait until Rufus finishes.
Step 12: Boot the Old PC from the USB Stick
Insert the USB installer into the old PC.
Power it on and open the boot menu. The key depends on the vendor, but common options include:
F12
F11
F10
Esc
Del
Select the USB drive.
If the machine does not boot from the USB stick, check:
- Whether the USB was created for the correct firmware mode.
- Whether the machine expects UEFI or legacy BIOS boot.
- Whether Secure Boot is enabled or disabled.
- Whether USB boot is enabled in firmware settings.
- Whether the USB stick appears under a different boot name.
Step 13: Install Tiny11
The installation process looks like a normal Windows 11 installation.
Choose:
Custom installation
Then select the target disk.
For a clean install, delete the old Windows partitions on the target drive and install into the unallocated space. Only do this after confirming your backup.
Windows Setup will copy files, reboot, and continue through initial setup.
Tiny11builder includes an unattended answer file designed to bypass the Microsoft Account requirement during OOBE and deploy the image with the /compact flag. This can make setup simpler, especially on older machines or lab devices.
Step 14: Install Drivers
After the first boot, check Device Manager.
Install missing drivers for:
- Chipset
- Graphics
- Wi-Fi
- Bluetooth
- Audio
- Touchpad
- Card reader
- Vendor-specific function keys
Prefer drivers from the PC manufacturer when available. For very old hardware, Windows Update may find enough drivers automatically, but that is not guaranteed.
If the machine has no working Wi-Fi after installation, use Ethernet or download drivers on another PC and copy them via USB.
Step 15: Update What Can Be Updated
Run Windows Update and apply available updates.
Because the regular Tiny11 maker keeps the system serviceable, updates, features, and language packs should be more realistic than with Tiny11 Core.
Also update Microsoft Store and Winget if you plan to use them. The Tiny11builder documentation notes that you may need to update Winget before being able to install apps through Microsoft Store.
Step 16: Install a Browser
Tiny11 may remove Microsoft Edge. Install the browser you want to use.
Options include:
winget install Mozilla.Firefox
winget install Google.Chrome
winget install Brave.Brave
winget install Vivaldi.Vivaldi
If Winget is not available or not working yet, download the browser installer manually from another machine and transfer it via USB, or use Microsoft Store after updating it.
Step 17: Install Only the Applications You Need
The whole point of Tiny11 is to stay minimal.
Avoid reinstalling the same bloat you just removed. For an old PC, be strict:
Good candidates:
- Browser
- Password manager
- Office suite or web apps
- PDF reader
- Remote desktop client
- Lightweight code editor
- Media player
- Hardware monitoring tool
- Backup tool
Avoid:
- Multiple antivirus suites
- Heavy vendor utilities
- Auto-starting updaters
- Unneeded cloud sync clients
- Game launchers unless the PC is actually used for gaming
- “PC optimizer” tools
A minimal system should remain minimal.
Step 18: Harden the Installation
Even if Tiny11 runs well, treat the machine as an unsupported or semi-supported endpoint.
Recommended baseline:
- Use a standard user account for daily work.
- Keep Windows Update enabled where possible.
- Keep Microsoft Defender or another reputable security solution active.
- Enable BitLocker only if the hardware and use case support it well.
- Use a modern browser with automatic updates.
- Remove local admin rights for non-technical users.
- Do not store sensitive secrets on the machine unless necessary.
- Use DNS filtering or browser security extensions where appropriate.
- Keep regular backups.
For a secondary PC, this may be enough. For sensitive work, use supported hardware instead.
Post-Install Performance Tips
After installation, a few practical changes can improve the experience further.
Replace the Hard Drive with an SSD
If the old PC still has a spinning disk, replace it. This is the single most important upgrade for Windows usability.
Increase RAM if Possible
4 GB can work for very light use, but 8 GB is much more comfortable. If the machine supports a cheap RAM upgrade, it is usually worth it.
Disable Unnecessary Startup Apps
Open Task Manager and review startup applications.
Disable anything that does not need to run all the time.
Use Web Apps Instead of Heavy Desktop Apps
On constrained hardware, web apps may be lighter than full desktop suites, depending on the workload. For example, Outlook on the web or lightweight document editing may be preferable to installing large local applications.
Keep Storage Free
Windows performs poorly when the system disk is nearly full. Try to keep at least 15–20% free space on small SSDs.
Avoid Heavy Background Sync
Cloud sync tools can be expensive on old hardware. If you need OneDrive, Dropbox, or similar tools, configure selective sync carefully.
Tiny11 vs. Linux vs. ChromeOS Flex
Tiny11 is not the only path for an old PC.
Linux is often the best technical option for old hardware. A lightweight Linux distribution can be faster, fully supported, and more transparent. If the user mostly needs a browser, office apps, and basic utilities, Linux may be the better long-term choice.
ChromeOS Flex is another option for browser-centric use. It can be excellent for a simple web terminal, family PC, or low-maintenance machine.
Tiny11 is the best fit when the deciding factor is Windows application compatibility. If the machine needs a specific Windows-only application, driver, tool, or workflow, Tiny11 can be more practical than switching operating systems.
The decision tree is simple:
Need Windows apps?        Consider Tiny11.
Mostly browser-based?     Consider ChromeOS Flex.
Comfortable with Linux?   Consider a lightweight Linux distribution.
Need corporate support?   Use supported Windows 11 hardware.
My Recommended Tiny11 Strategy
If I were using Tiny11 to rescue an old PC, I would use this approach:
- Upgrade the machine to an SSD first.
- Add RAM if possible.
- Download the official Windows 11 ISO from Microsoft.
- Build Tiny11 myself using Tiny11builder.
- Use the regular
tiny11maker.ps1, nottiny11coremaker.ps1. - Install cleanly from USB.
- Install only required drivers and applications.
- Keep Windows Update and security tooling active.
- Use the machine for low-risk workloads.
- Avoid storing sensitive secrets or using it as a privileged admin workstation.
That gives you most of the benefit while minimizing unnecessary risk.
Conclusion
Tiny11 is not a supported Microsoft upgrade path, and it should not be presented as one. It is also not a licensing shortcut or a security silver bullet.
But it is a pragmatic tool.
For older PCs stranded by Windows 11’s official hardware requirements, Tiny11 can provide a lightweight Windows 11 experience that is good enough for many secondary, personal, lab, and hobby scenarios. It removes much of the default Windows clutter, reduces the footprint, and can make aging hardware feel useful again.
The responsible way to use it is to build the image yourself from an official Microsoft ISO, use the regular serviceable Tiny11builder script, keep the system patched where possible, and be honest about the support boundary.
In a world where many functional PCs risk becoming e-waste because of software lifecycle and hardware requirement changes, Tiny11 offers a useful middle path: not perfect, not official, but technically interesting and often practically effective.